
2020. 4. 23. 17:19ㆍBACKEND/Node
안녕하세요 ❗️ 오랜만에 포스팅을 하게 됐습니다 ^~^
이번에는 React와 Express를 연동하여 웹 프로젝트를 간단하게 만들어 볼 예정이에요❗️
데이터베이스는 mongoDB를 사용하며 IDE는 VSCode를 사용합니다.
mongoDB에 대해 어색하신 분들은 이 전 시리즈인 Express + MongoDB, 간단한 프로젝트 만들기 를 참고하시길 추천합니다.
이 포스팅은 웹 프론트와 서버를 연결하고, 작동시키는 것에 초점을 두기 때문에 코드의 문법이나 특징에 대한 내용은 생략할 것입니다.
이 시리즈는 총 3편으로 구성되어 있으며, 본 편은 시리즈의 세 번째 포스팅입니다.
🔥 실제로 제작한 메모는 이 곳에서 확인할 수 있습니다. 메모를 자유롭게 남겨주세요 〰️ 🔥
첫 번째 포스팅 : server - express
두 번째 포스팅 : database - mongoDB
세 번째 포스팅 : client - react
React를 사용해서 client를 만들어 볼 예정입니다.
일단, React를 설치해봅시다.
터미널에 아래와 같은 명령어를 입력해봅시다 〰️
❗️ 주의❗️ server 밖 / 최상위 폴더 위치에서 명령어를 입력해주세요 ❗️
설치하는 방법에 대해 어려움이 있다면 이 곳을 참고해주세요 ~.~
react에서는 yarn을 사용하기 때문에 yarn도 같이 설치해주세요.
$ npm install --save react react-dom	// react 설치
$ npm install -g create-react-app  	// react app 생성 모듈
$ create-react-app client		// client 라는 이름을 가진 react app 생성
🚨 본 포스팅은 프로젝트를 제작하는 방식에 포커스를 두었습니다. 코드에 대한 설명을 하지만 따로 문법이나, 구조에 대한 설명을 하지 않으니 React에 대한 개념이 부족하다면 따라하기 힘드실 수 있습니다.
오늘 내용은
1. Client, 메모가 보이는 뷰 짜기
2. server & client 를 동시에 실행하기
3. 메모 추가하는 modal component 만들기
첫 번째. Client, 메모가 보이는 뷰 짜기
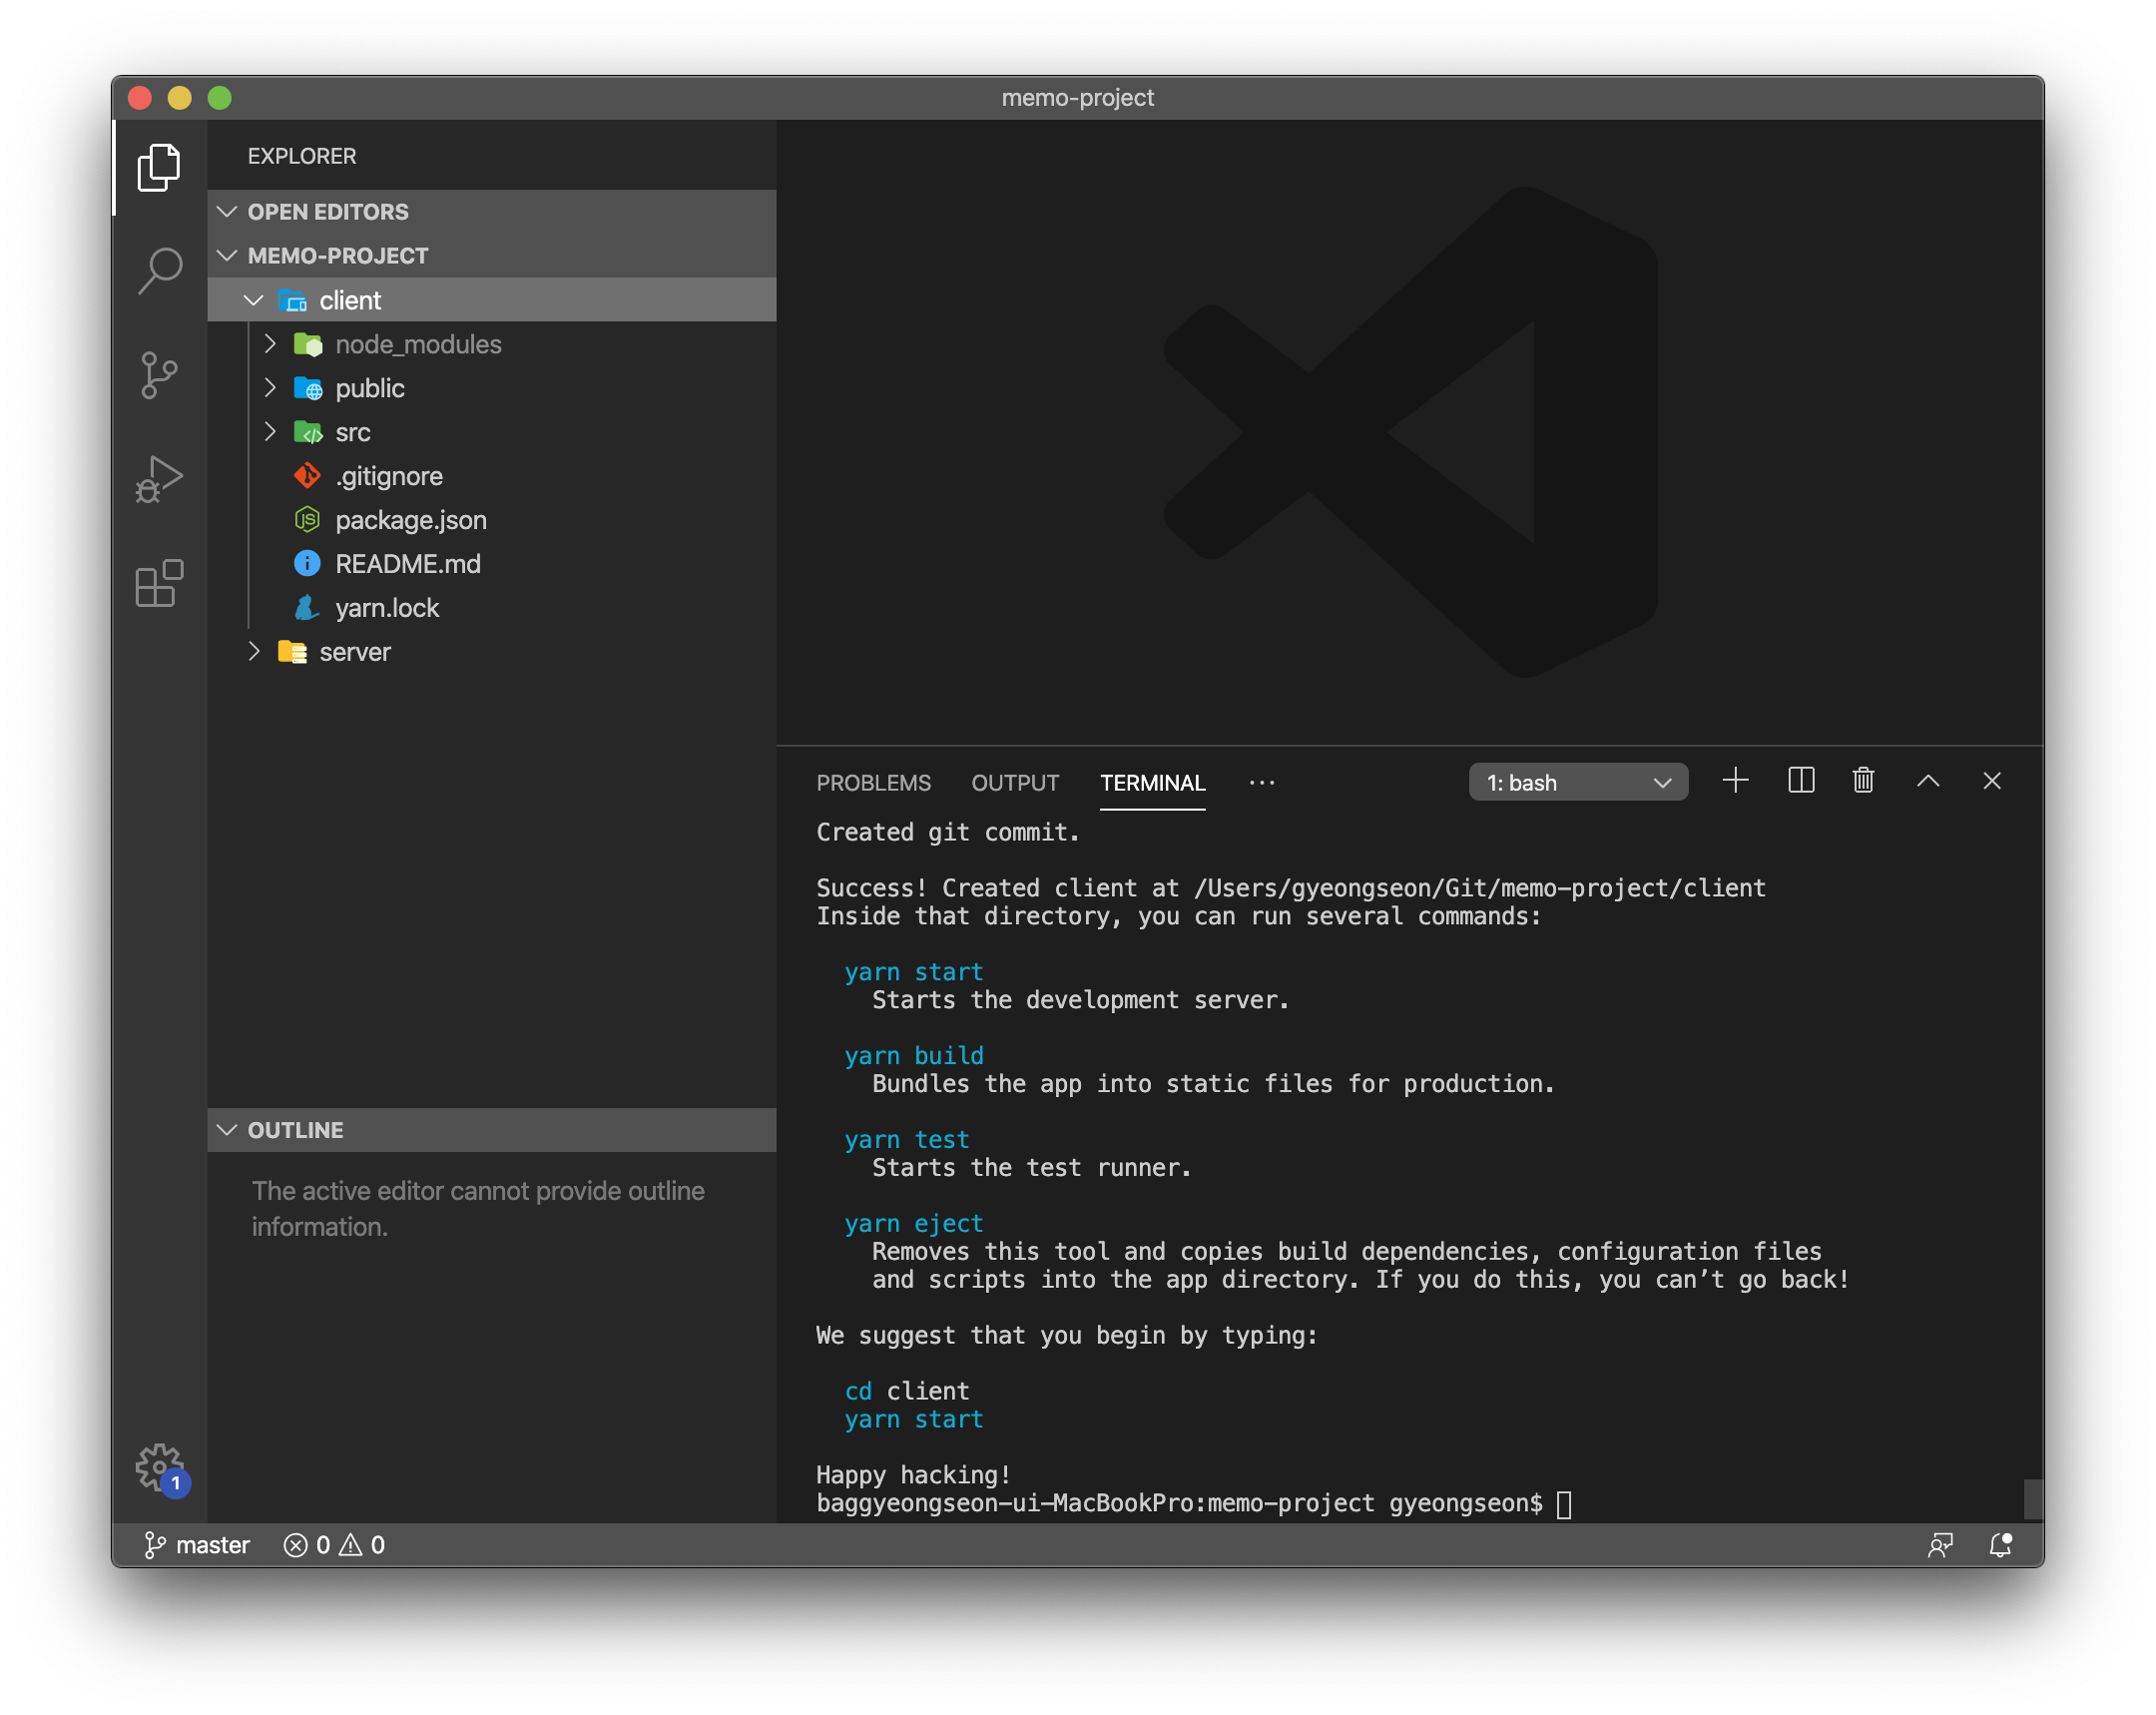
위와 같이 client라는 react app이 생성되었나요❓
잘하셨습니다 👏🏻👏🏻👏🏻
자, 이제부터 내용을 채워보도록할게요 〰️
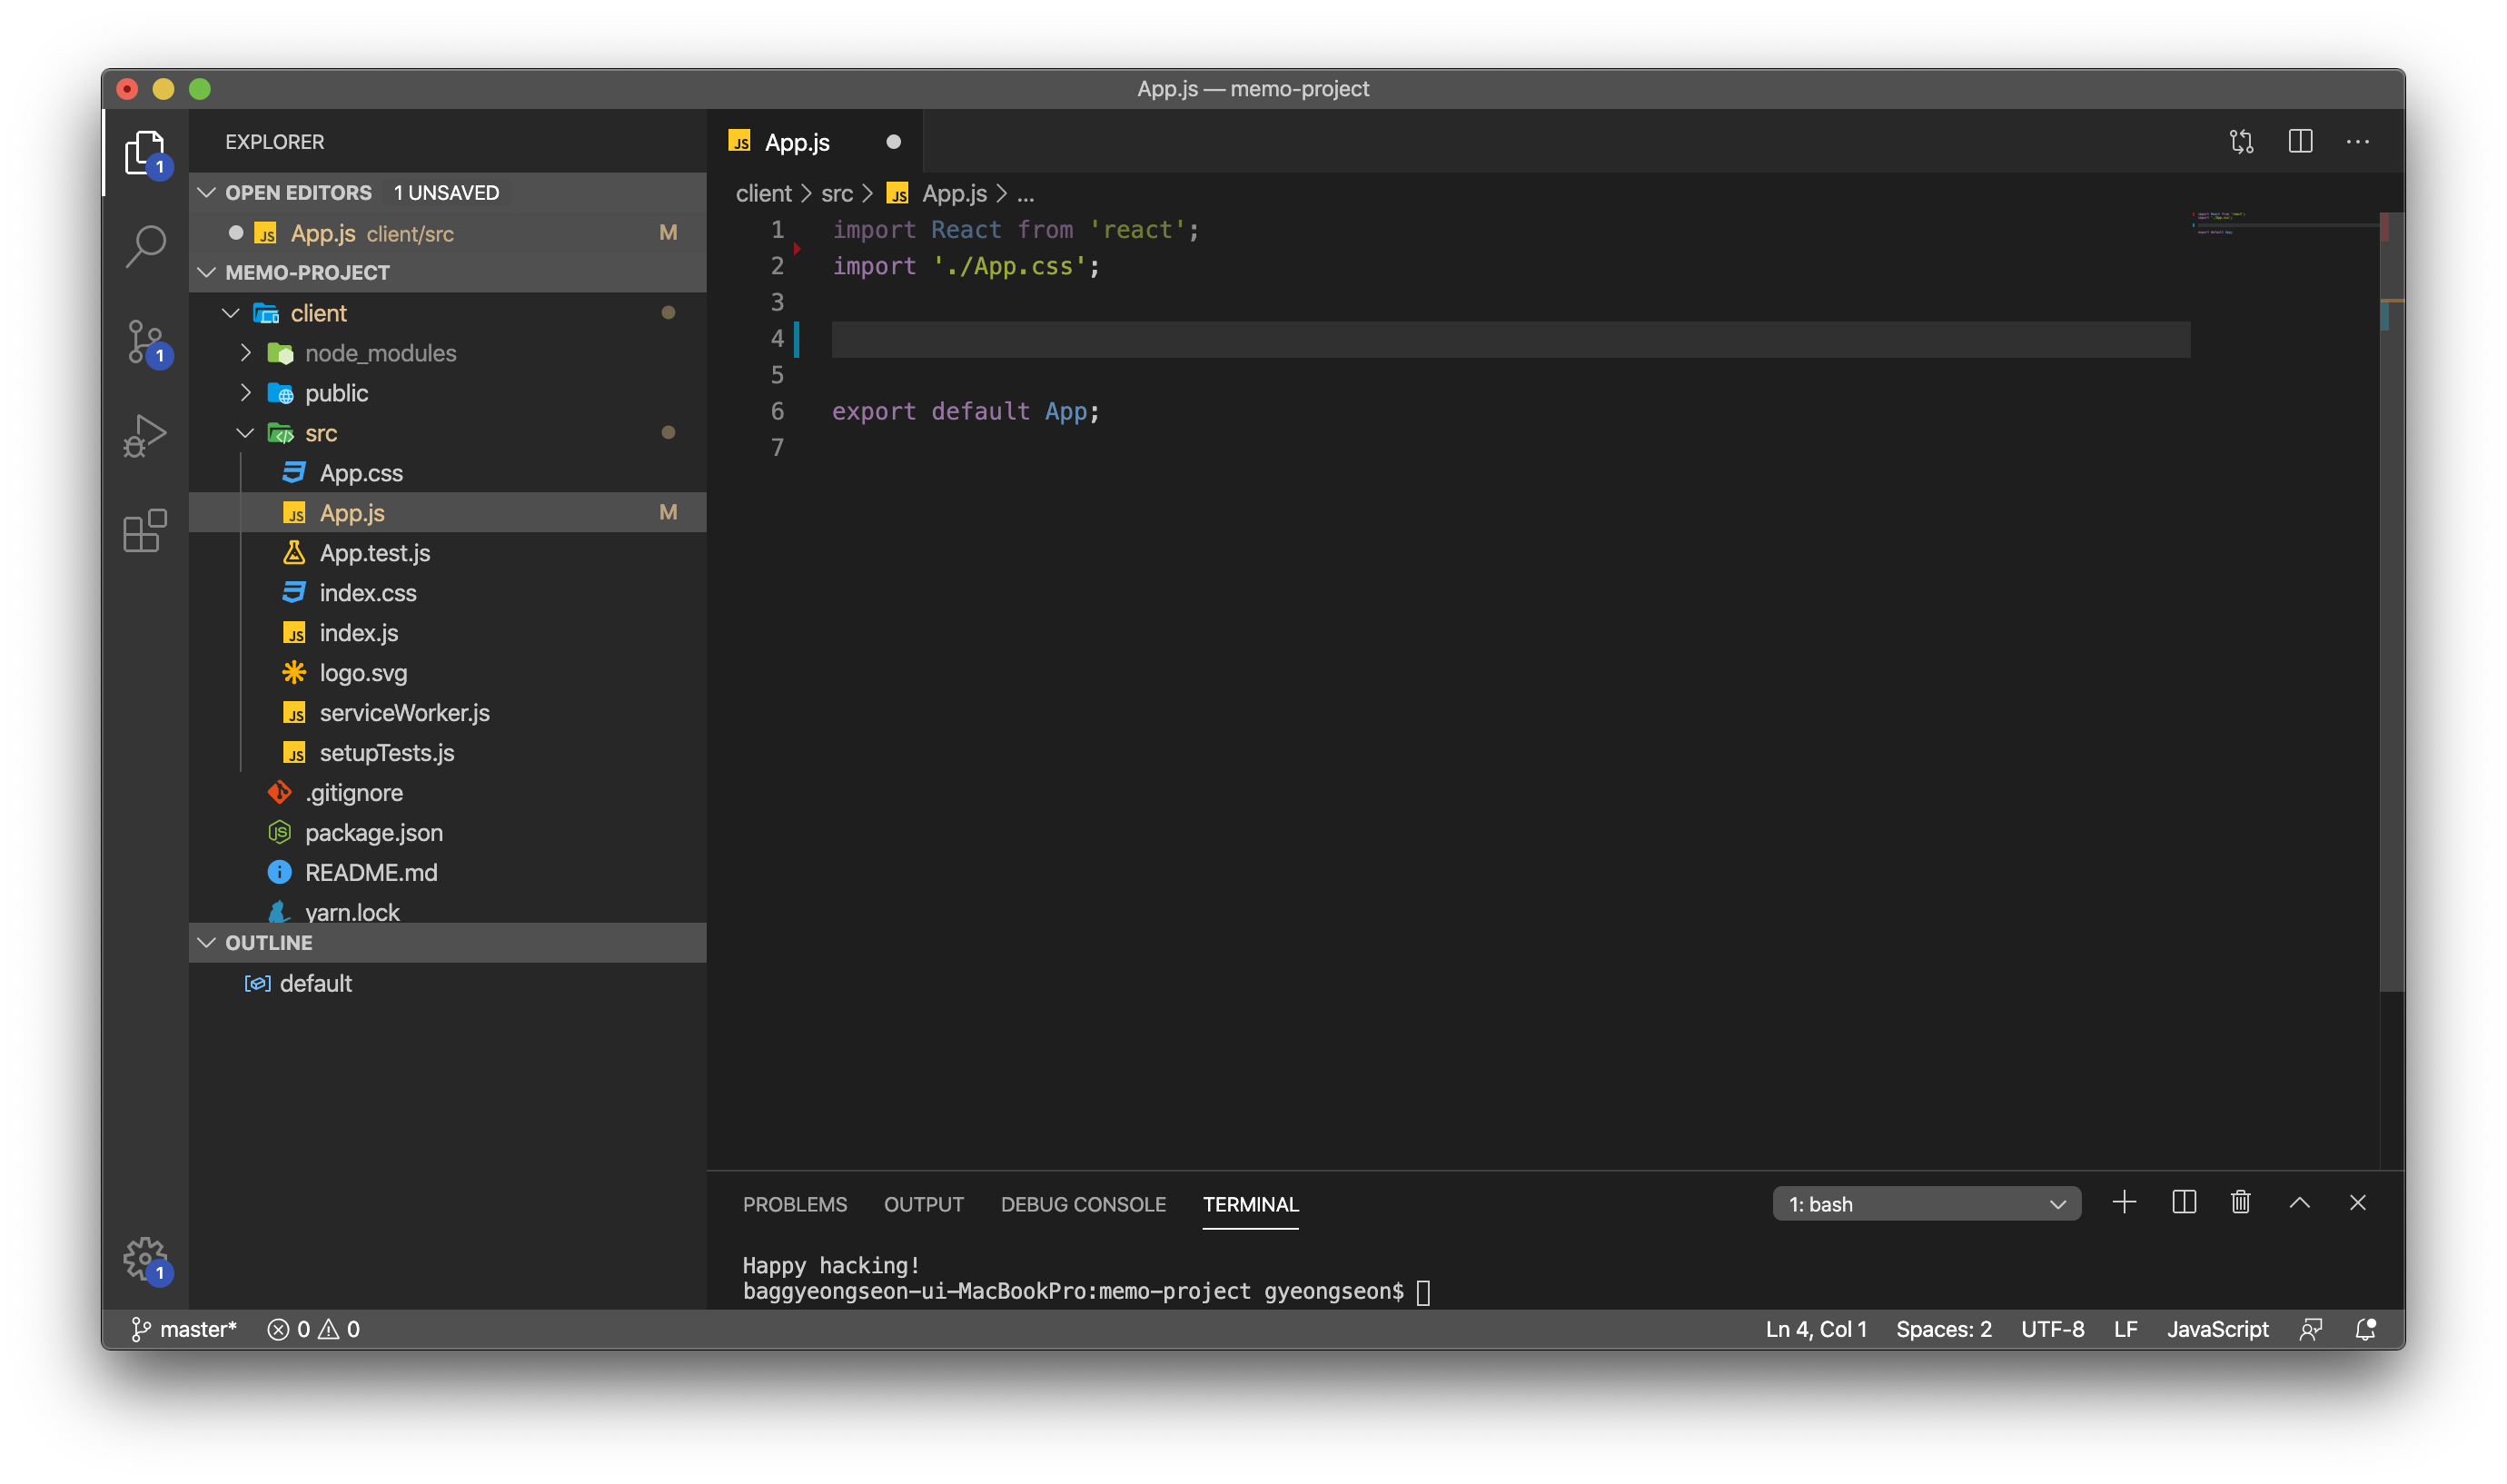
일단, client/src/App.js 의 내용을 지워줍니다.
이제부터 같이 채워 나가볼게요 ❗️
그 전에, package.josn에서 proxy server에 대한 설정값을 주어야 합니다.

34줄을 추가해주었습니다 〰️
이번엔 src/App.js 에 가서 시각적으로 보이게끔 만들어 볼게요.
단계별로 진행해보도록 하겠습니다.
첫 번째, 데이터로 넘어오는 memos 보여주기
App.js를 수정해보도록 할게요.
// client/src/App.js

import React from 'react';
import './App.css';

class App extends React.Component {

  constructor(props){
    super(props);
    this.state = {
      memos: []
    }
  }

  render() {
    return (
      <div className='container'>
      <div className='App'>
        <h1> 메모장 </h1><br/><br/>
        <table>
        	<tbody>
         		<tr className='trList'>
                {
                this.state.memos.map ( memo =>
                	<td className='cell' key={memo._id}>
                    	<div className='inner'>
                        	<h2> {memo.title} </h2>
                            <h5> {memo.author} </h5><br/><br/>
                            <h4> {memo.content} </h4><br/>
                        </div>
					</td>
                )}
				</tr>
			</tbody>
      	 </table>
      </div>
      </div>
    );
  }
}


export default App;
이후에 App.css의 내용도 수정해보겠습니다.
/* client/src/App.js */

.App {
  text-align: center;
}

* {
  background: #f3f4f8;
}

.cell {
  width: 300;
  height: 300;
  padding: 5px;
  text-align: center;
  flex-direction: row;
  cursor:pointer;
  padding: 15px;
}

.inner {
  width: 230px;
  height: 230px;
  border-radius: 20px;
  box-shadow:  inset -7px -7px 8px #eeeff3, inset 7px 7px 8px #f8f9fd;
  display: flex;
  flex-direction: column;
  align-self: center;
  padding: 30px;
  margin: auto;
  /* 세로 정렬 */
  justify-content: center;
  /* 가로 정렬 */
  align-items: center;
}


.picture {
  height: 150px;
  width: 170px;
  border-radius: 10px;
}

.trList {
  display: flex;
  /* padding: 5%; */
  margin: auto;
  flex-wrap: wrap;
  flex-direction: row;
}

h5, h4, h3, h2, h1, p {
  color : #403f3e;
  font-weight : 300;
  margin: 5px;
}

.shadow {
  box-shadow: 5px 5px 10px #e4e4e4, -5px -5px 10px #ffffff;
}

.container {
  padding: 5%;
}

@media screen and (min-device-width: 375px) and (max-device-width: 768px) {
  .buttonTr {
    width: 100%;
    margin: 10% 40px;
    height: 30px;
    padding: 30px 50px;
    align-items: center;
  }

  .cell {
    width: 90%;
    height: 70%;
    /* padding: 5px;*/
    margin: 0% 3% 0% 3%;
    text-align: center;
    flex-direction: row;
  }
}
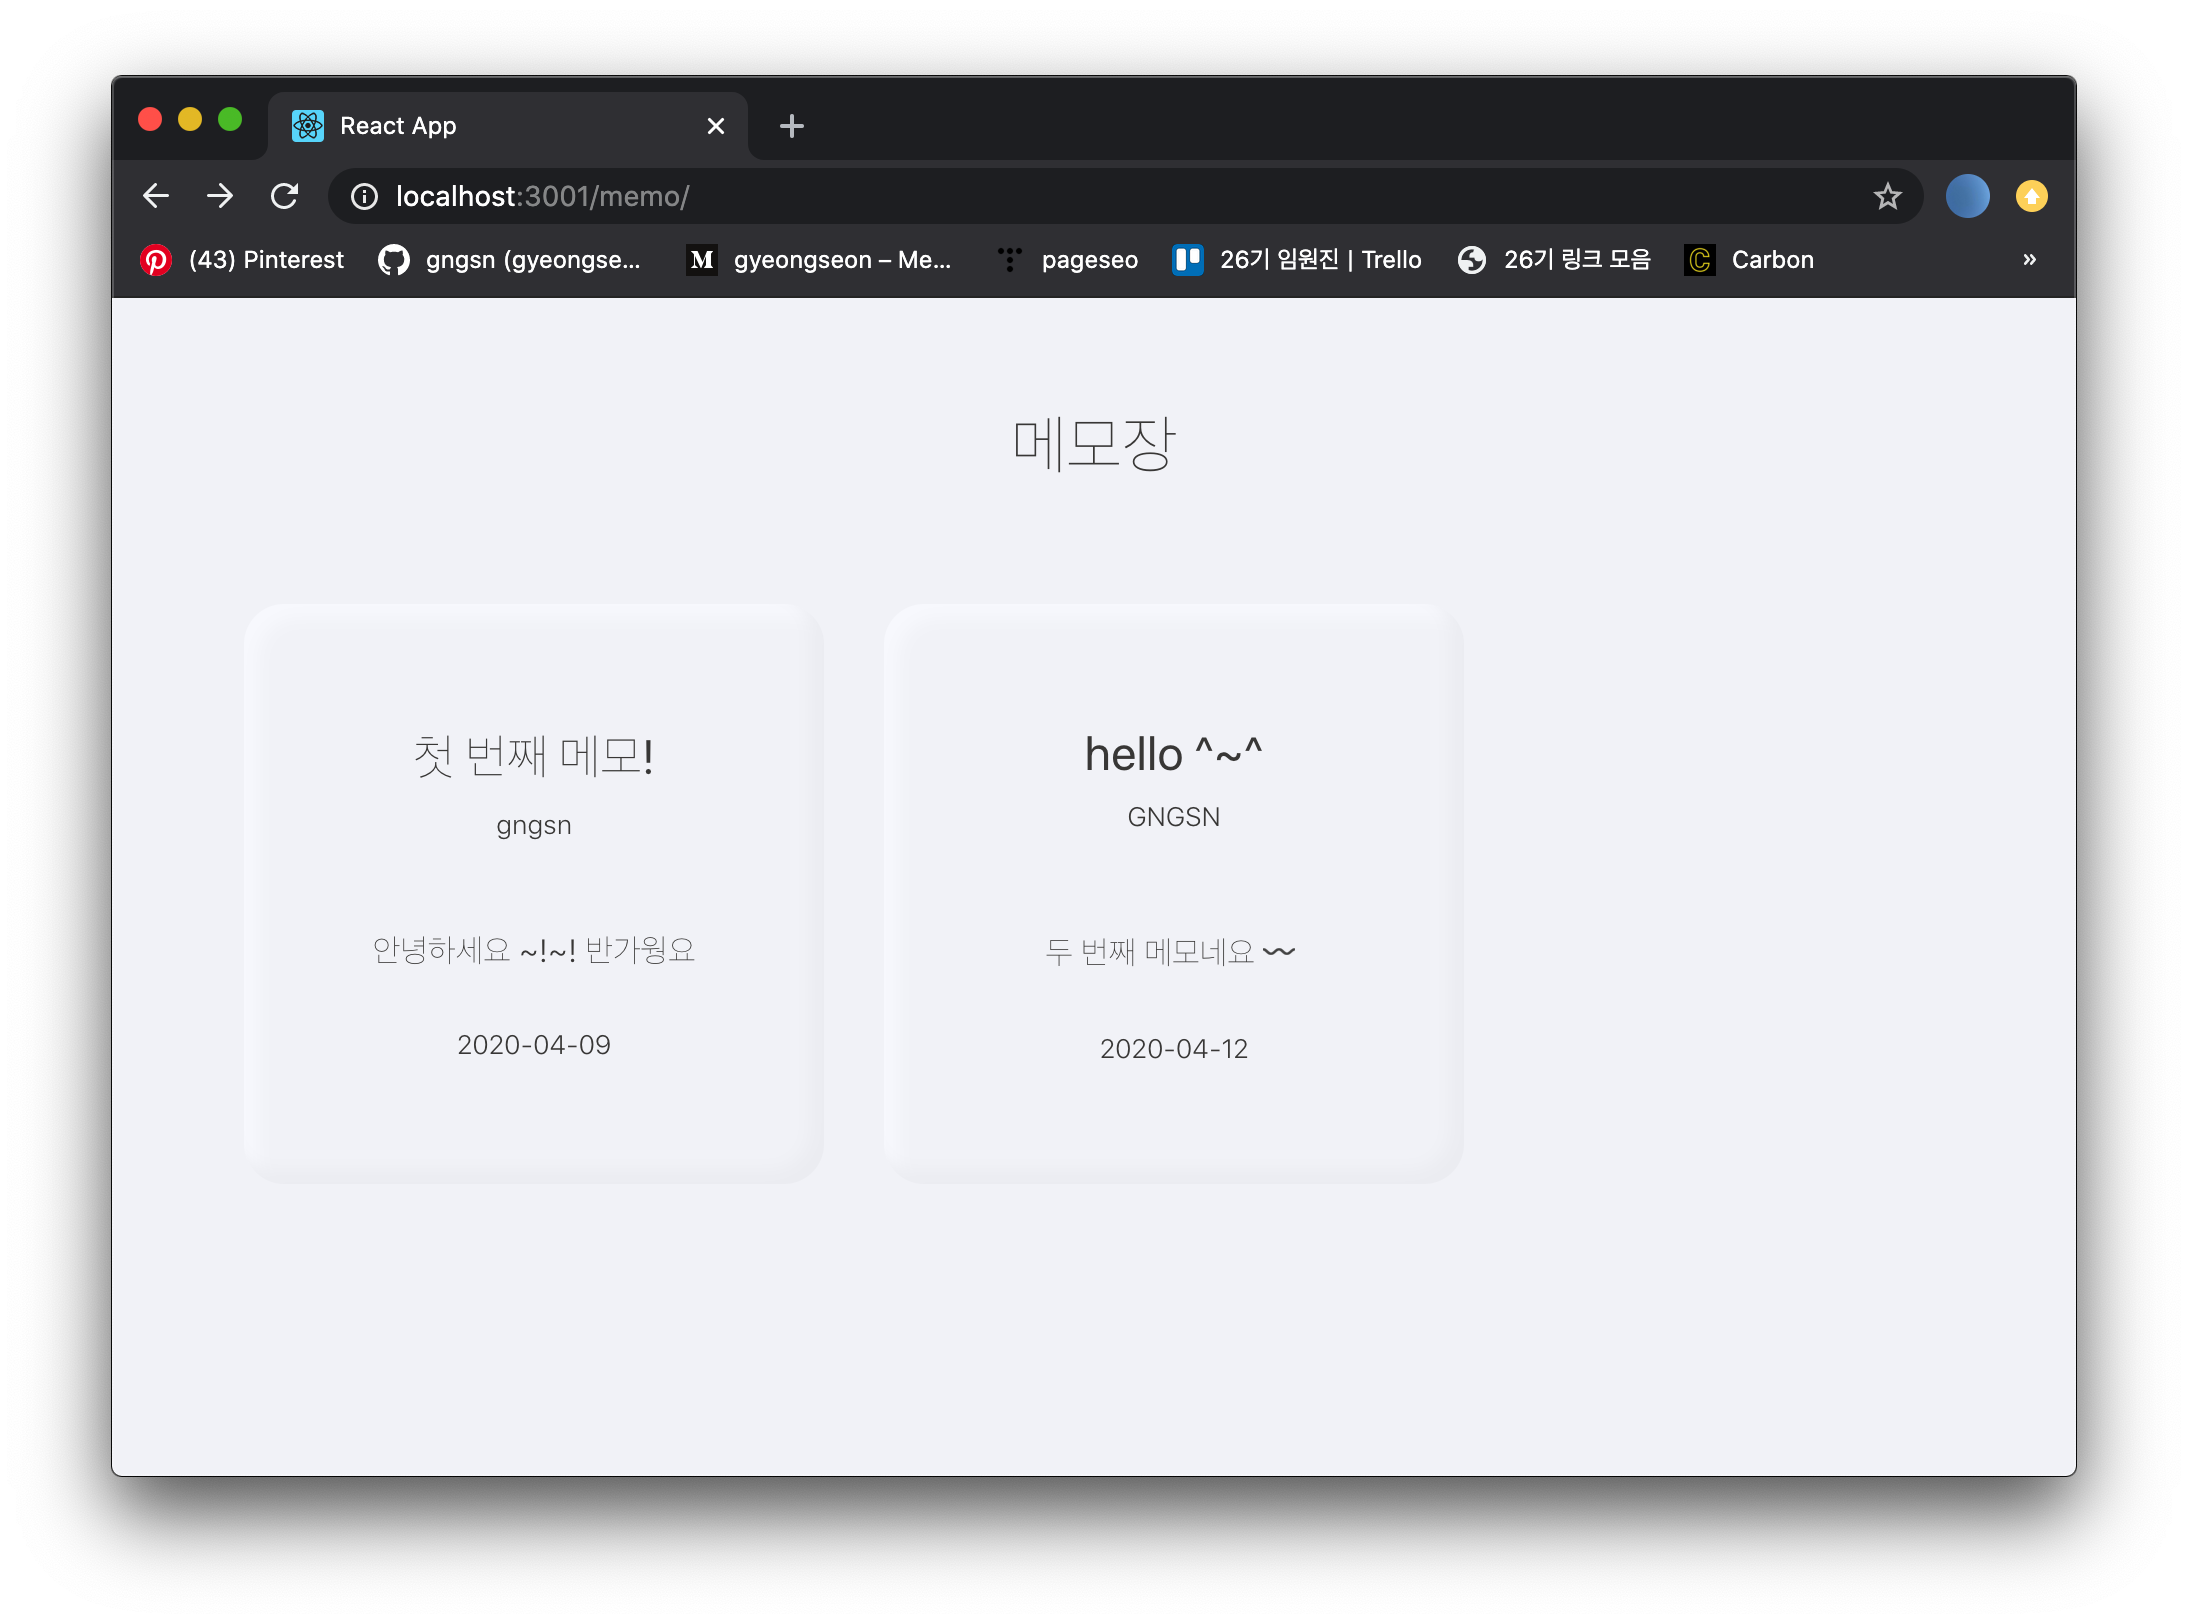
자 이렇게 입력해보면,,,
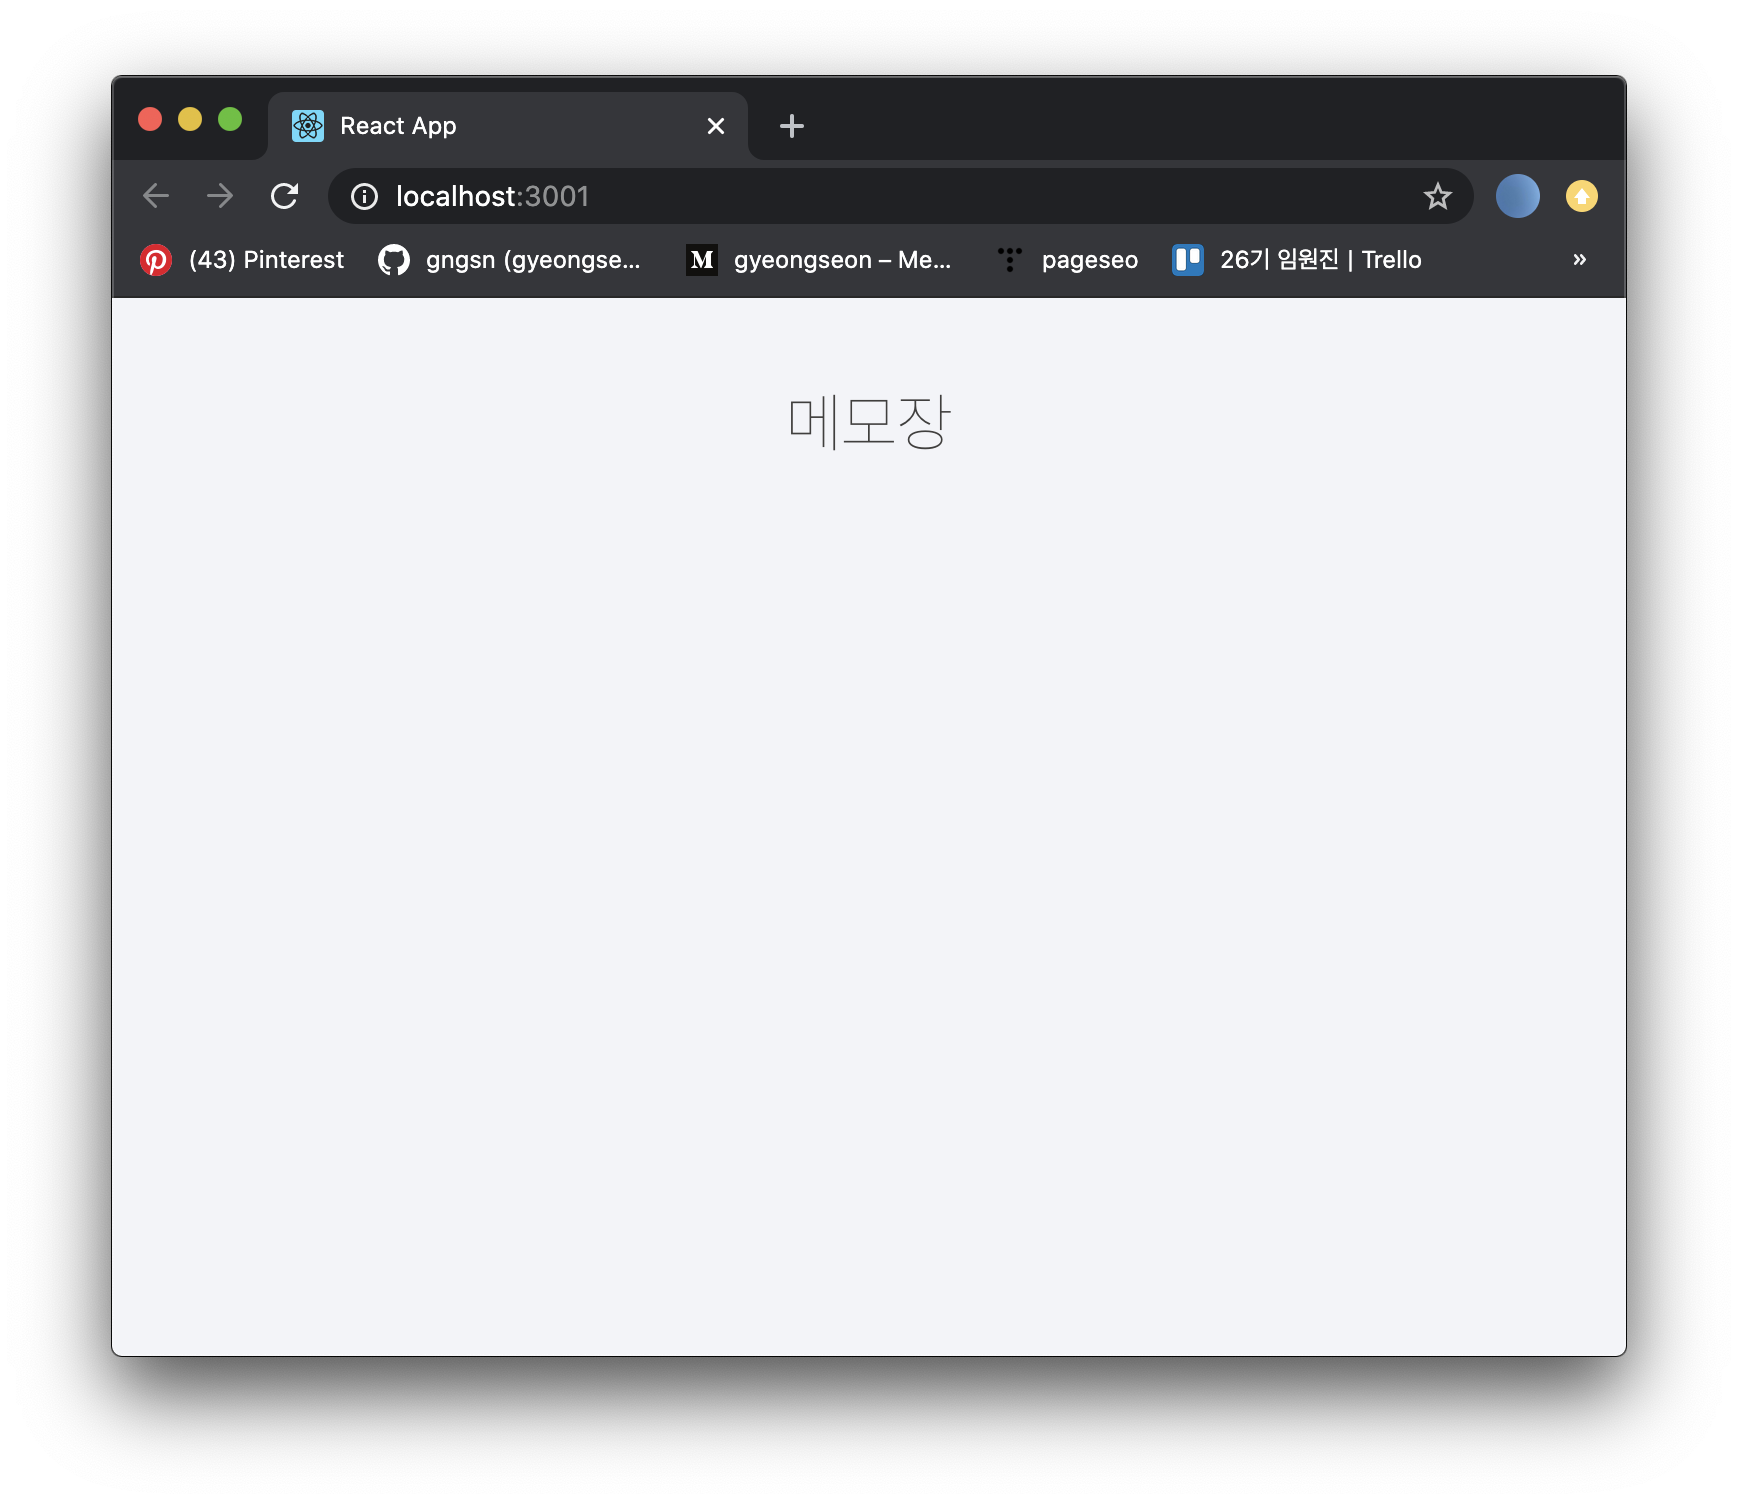
이렇게 밖에 나오질 않아요🤣 memos 배열에 아무 값도 없기 때문인데요.
서버를 만들어두었기 때문에 서버와 연결을 시켜서 데이터를 받게끔 해봅시다❗️
fetch() 함수를 사용해 보도록하겠습니다.
class App React.Component {
	constructor(props){
    	...
    }

    componentWillMount() {
      fetch('/memo', {
        method: "GET",
        headers:{
          "Content-Type": "application/json;charset=UTF-8",
          'Accept': 'application/json',
          },
        mode:"cors",
      }).then( res => {
        return res.json();
      })
      .then( memos => {
        this.setState({memos: memos});
        console.log( "Network success - memo : ", memos );
      })
      .catch( error =>
        console.log( "Network Error : ", error )
      );
    }

    render(){ ... }
}
위와 같이 연결을 해줍니다.
하지만 지금 서버를 구동중이지 않아요. 그래서 데이터를 바로 받을 수가 없는데요.
그래서 이번엔 서버로 돌아가서 server & client를 동시에 실행시키도록 설정해줄 것입니다.
그 전에 동작시키던 react app은 작동을 중지시켜야 합니다.
control + c 를 입력해주세요.
두 번째, server & client 동시에 실행하기
서버와 클라이언트를 동시에 작동시키기 위해서는 server에 모듈을 하나 설치해야 합니다.
터미널을 이용해 server로 돌아와 주세요.
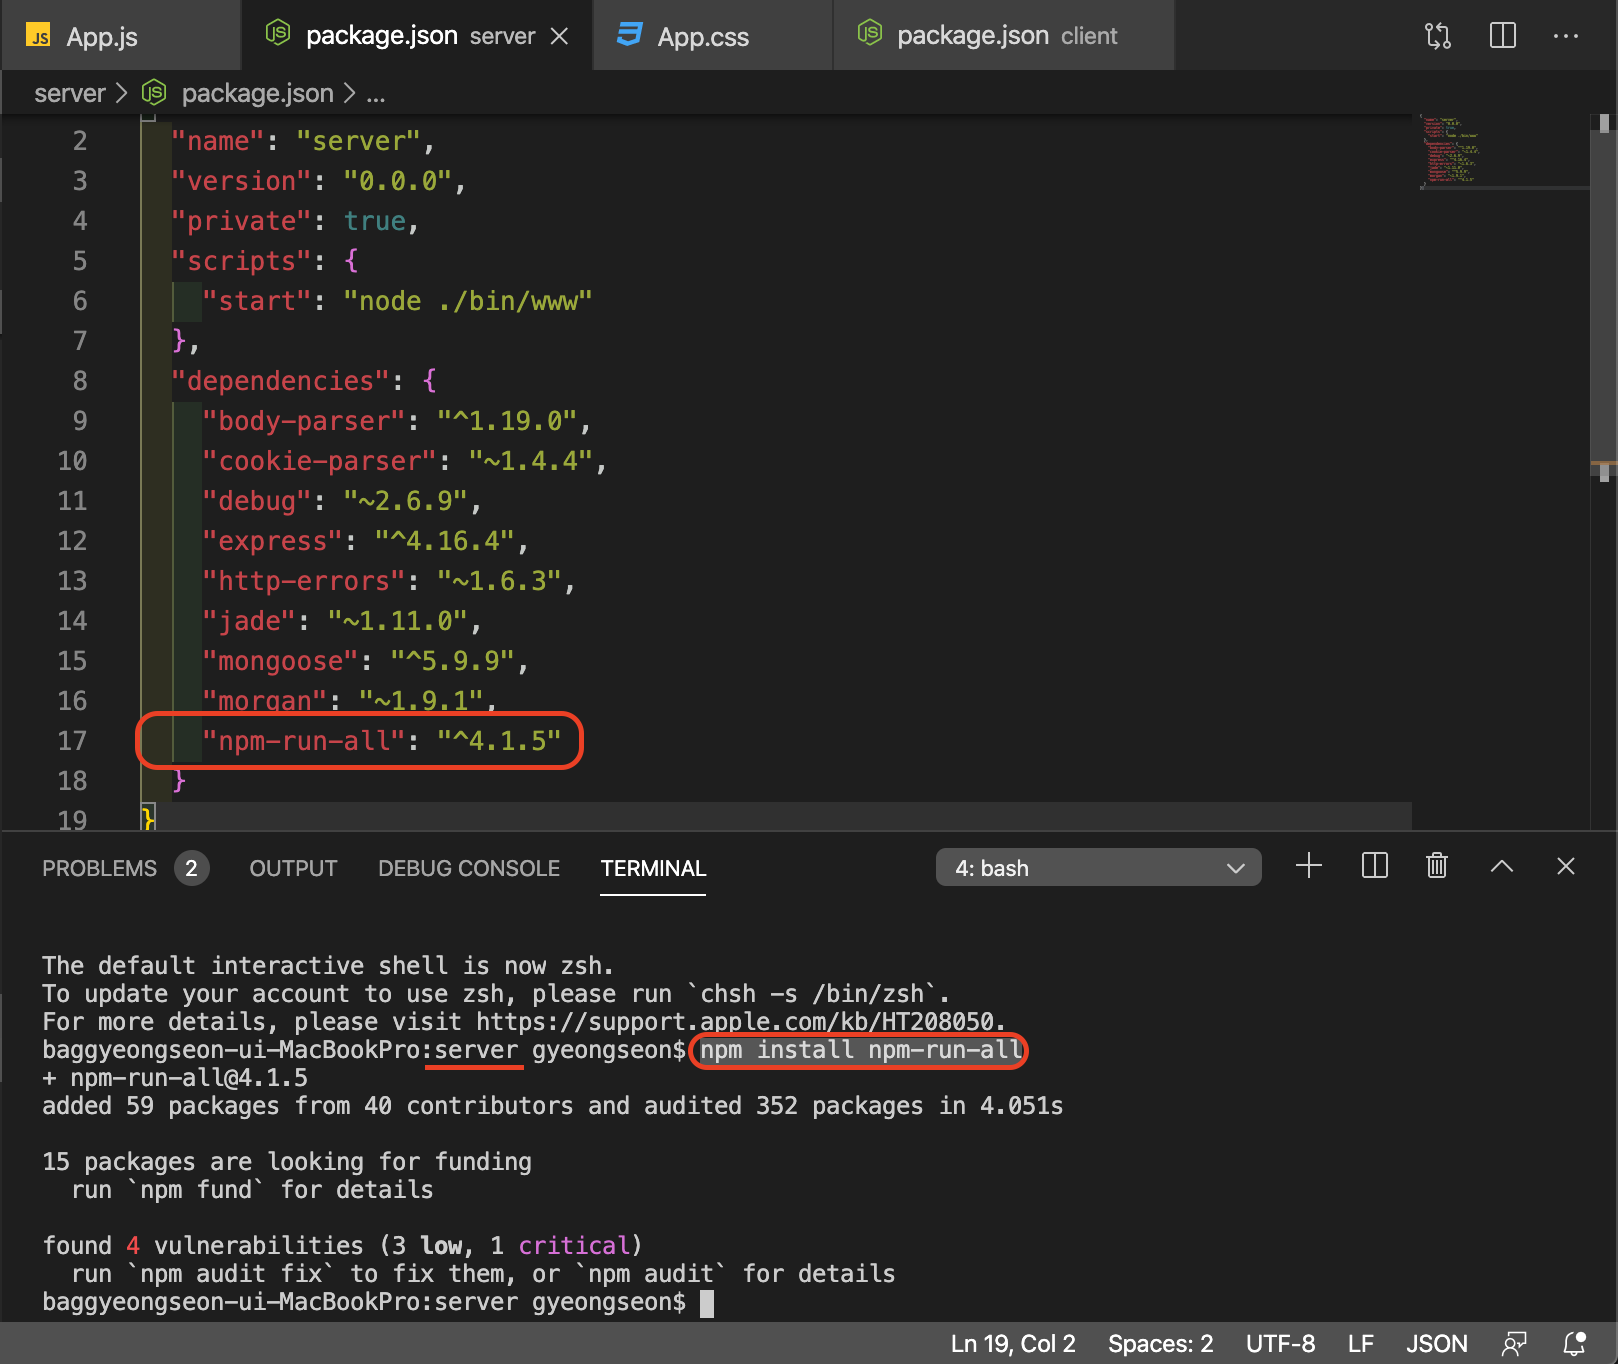
$ npm install npm-run-all
명령어를 입력해주세요.
// 기존
  "scripts": {
    "start": "node ./bin/www"
  }

// 변경
  "scripts": {
    "start": "npm-run-all --parallel start:**",
    "start:client": "cd ../client && yarn start && yarn start",
    "start:server": "node ./bin/www"
  },
아래와 같이 코드를 변경해주시길 바랍니다〰️
모듈 이름에서 알 수 있듯이 설정된 프로젝트를 모두 실행시키는 모듈입니다❗️
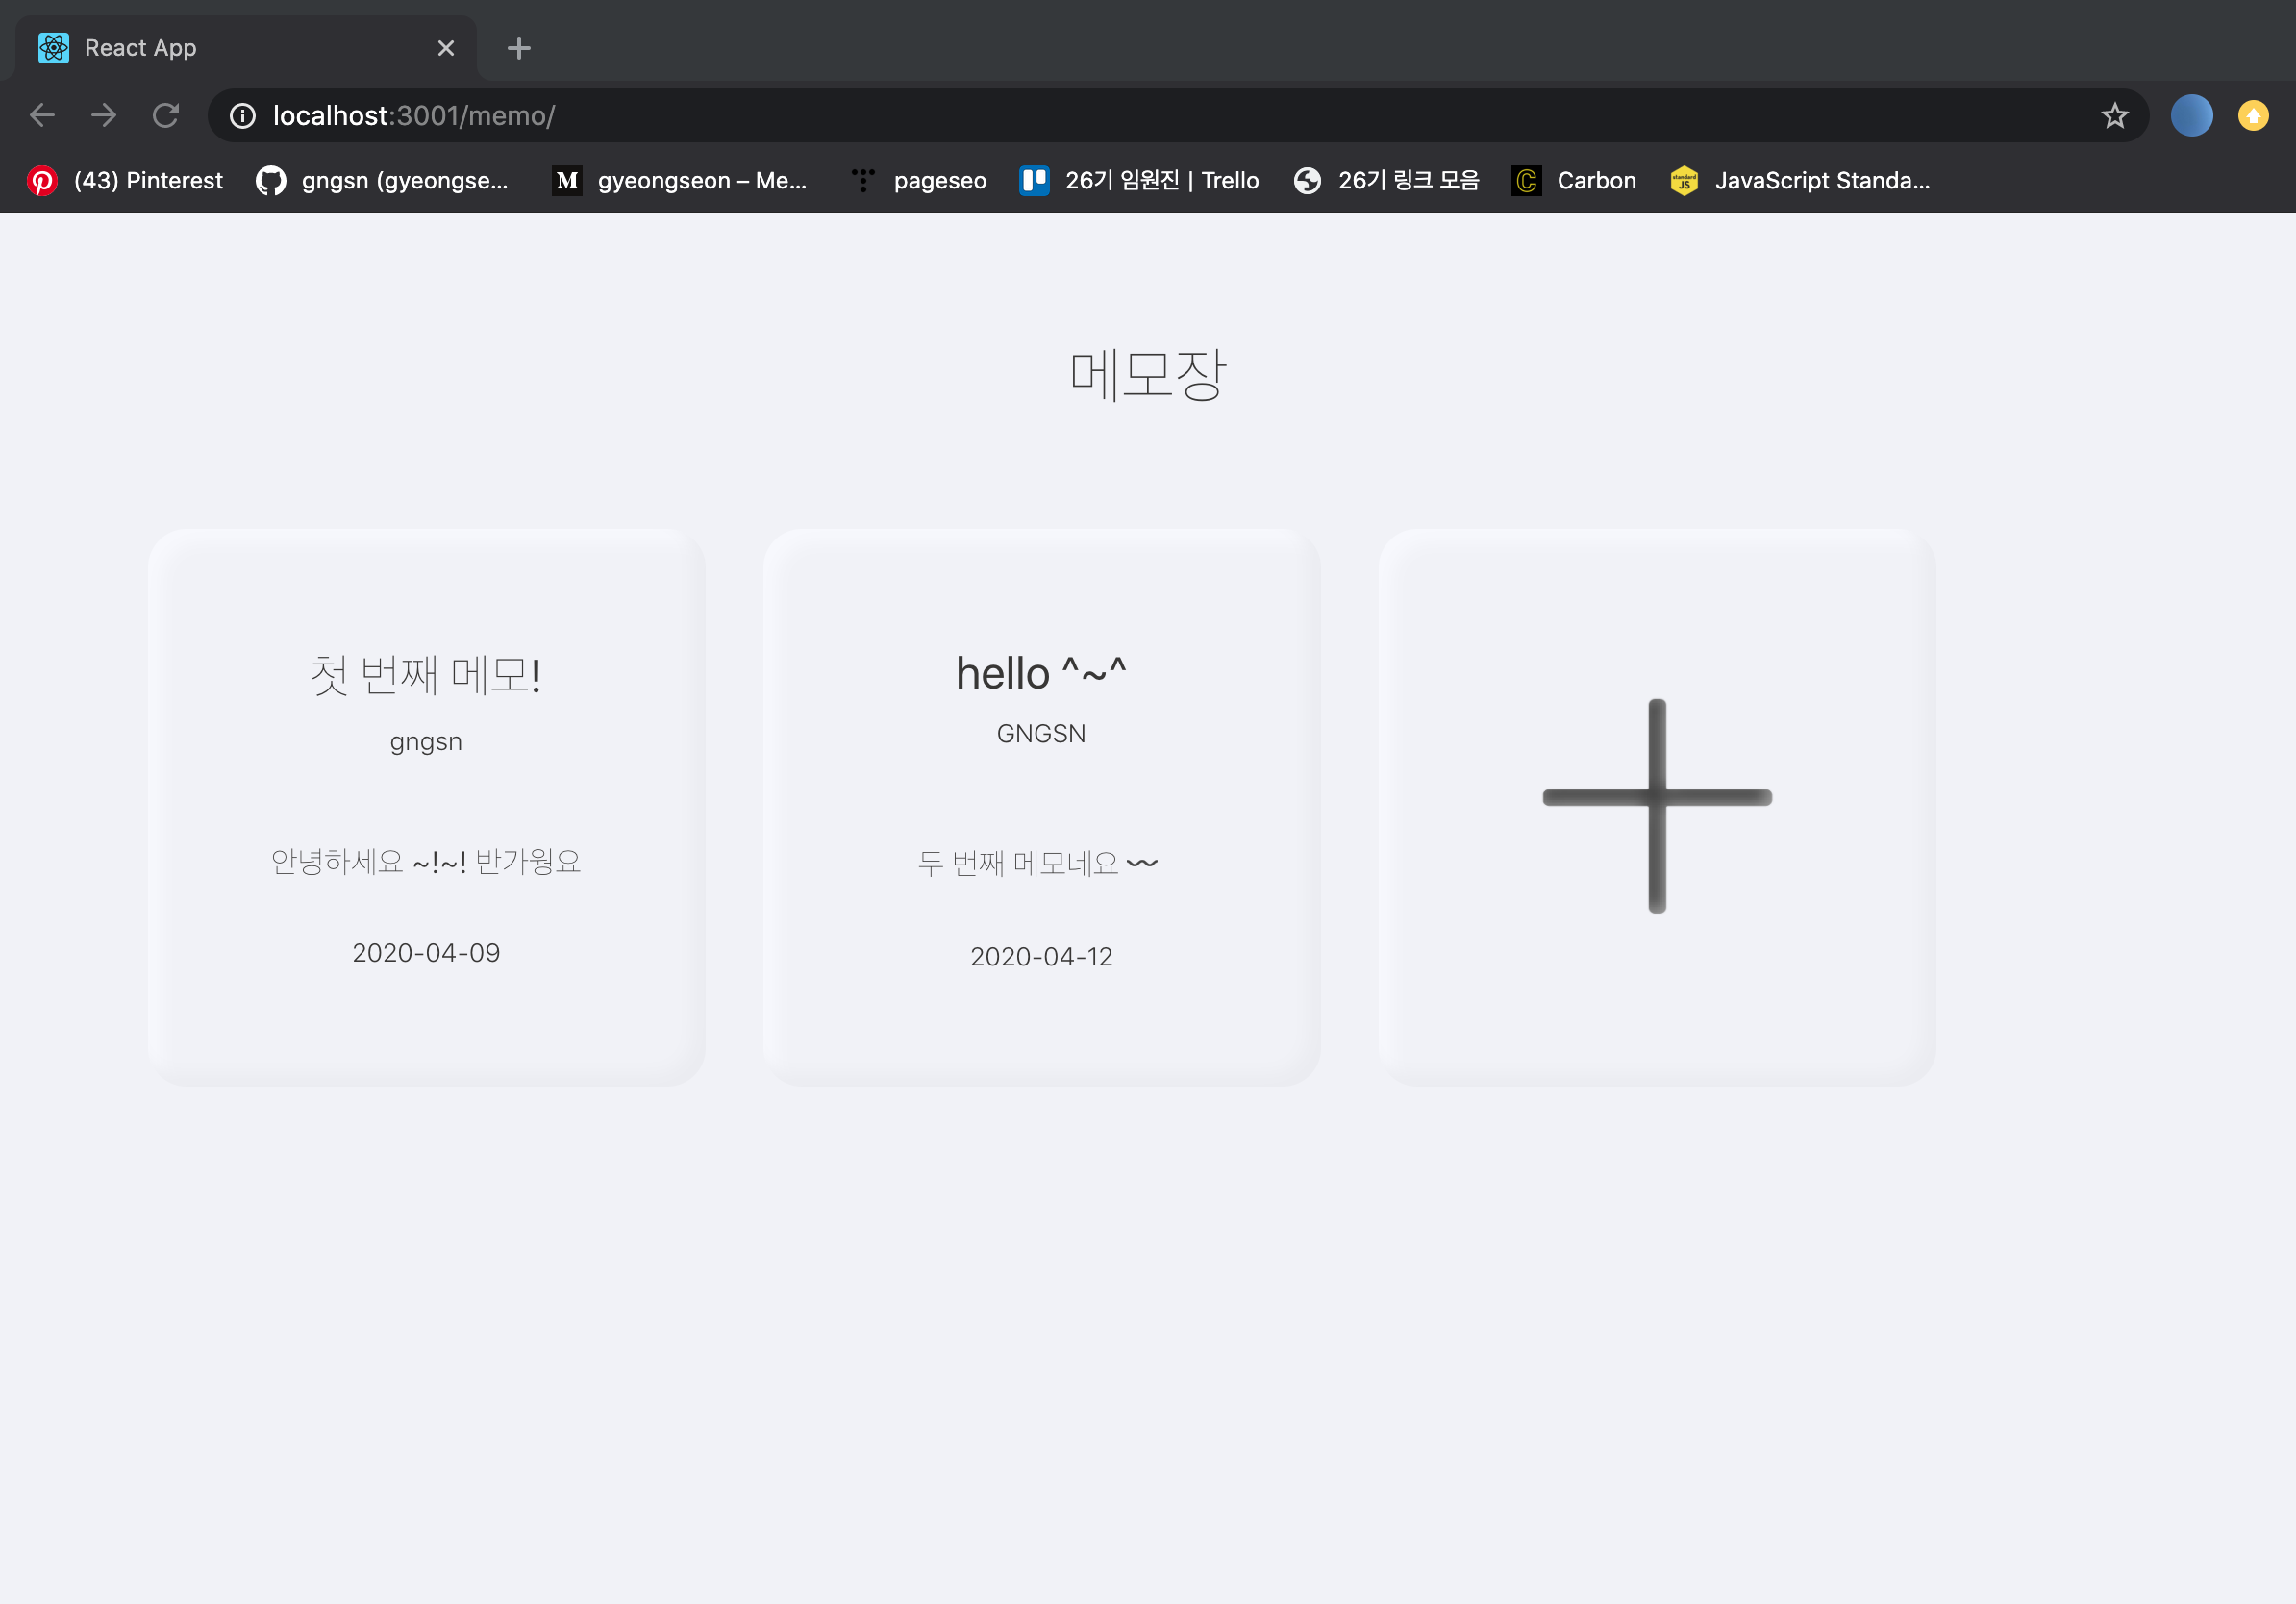
다음과 같이 이미지가 나오나요❓
세 번째, Modal Componenet 생성해서 메모 추가 기능 구현하기
자, 이제 POST METHOD를 사용해서 메모를 추가해볼 예정입니다.
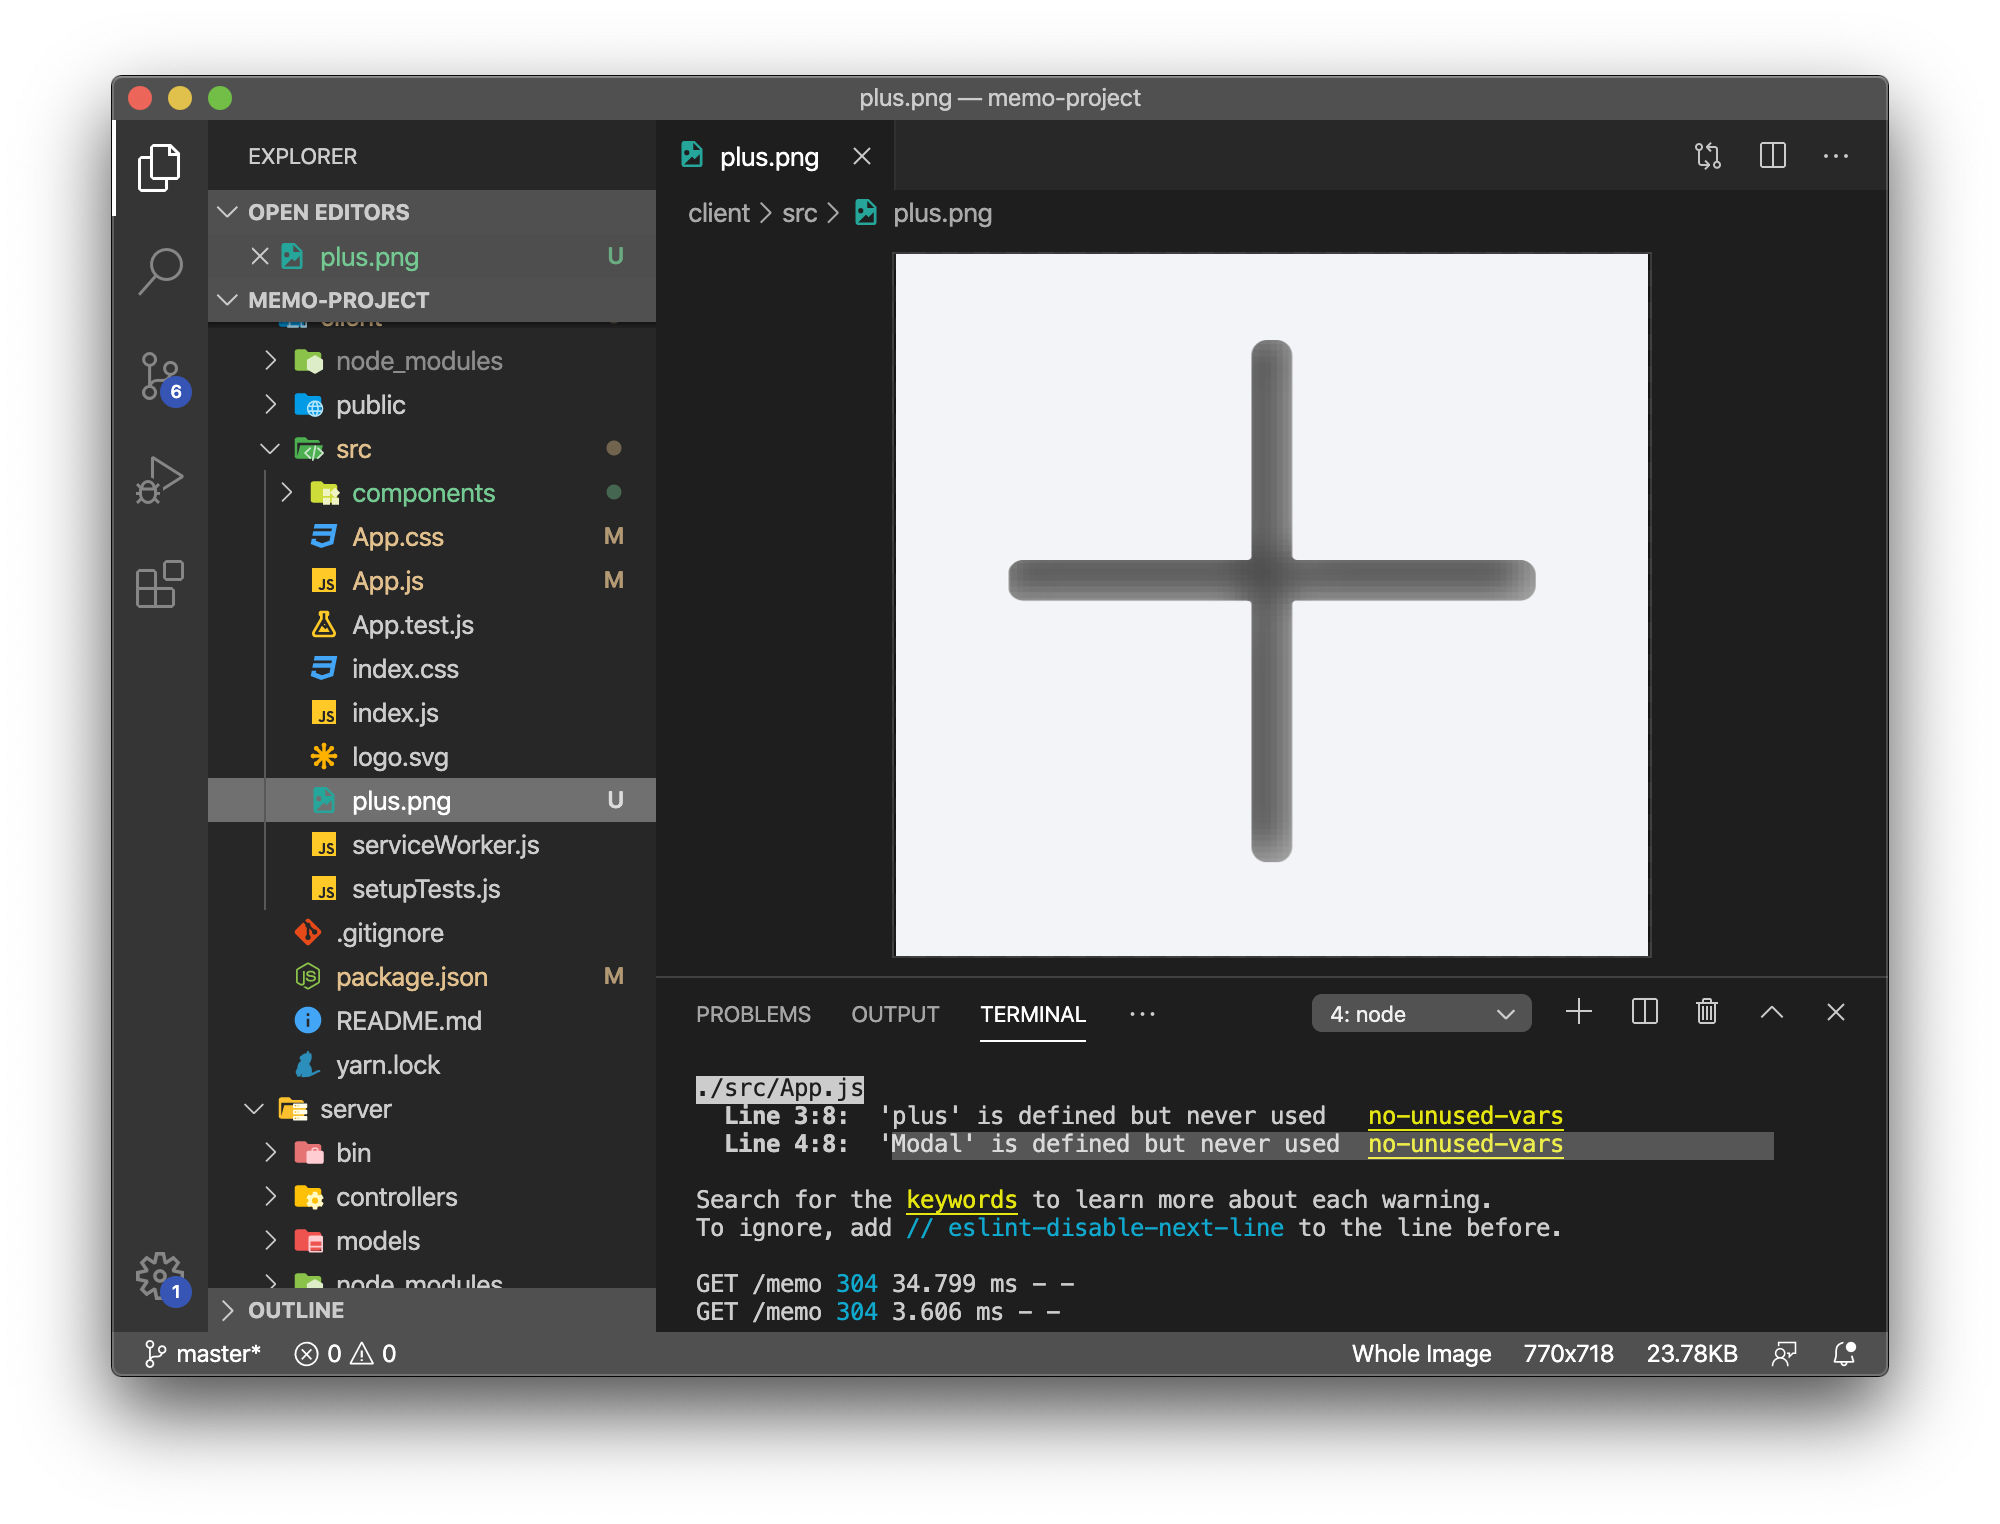
일단 plus.png 파일을 만들어서 추가 버튼 이미지를 넣어주었어요.
이걸 App.js에서 가져와 메모 출력이 끝난 바로 다음 칸에 넣어보도록 할게요.
그리고 src 폴더 아래에 components라는 폴더를 만들었습니다.
내부에 Modal.js, Modal.scss 를 생성해주세요.
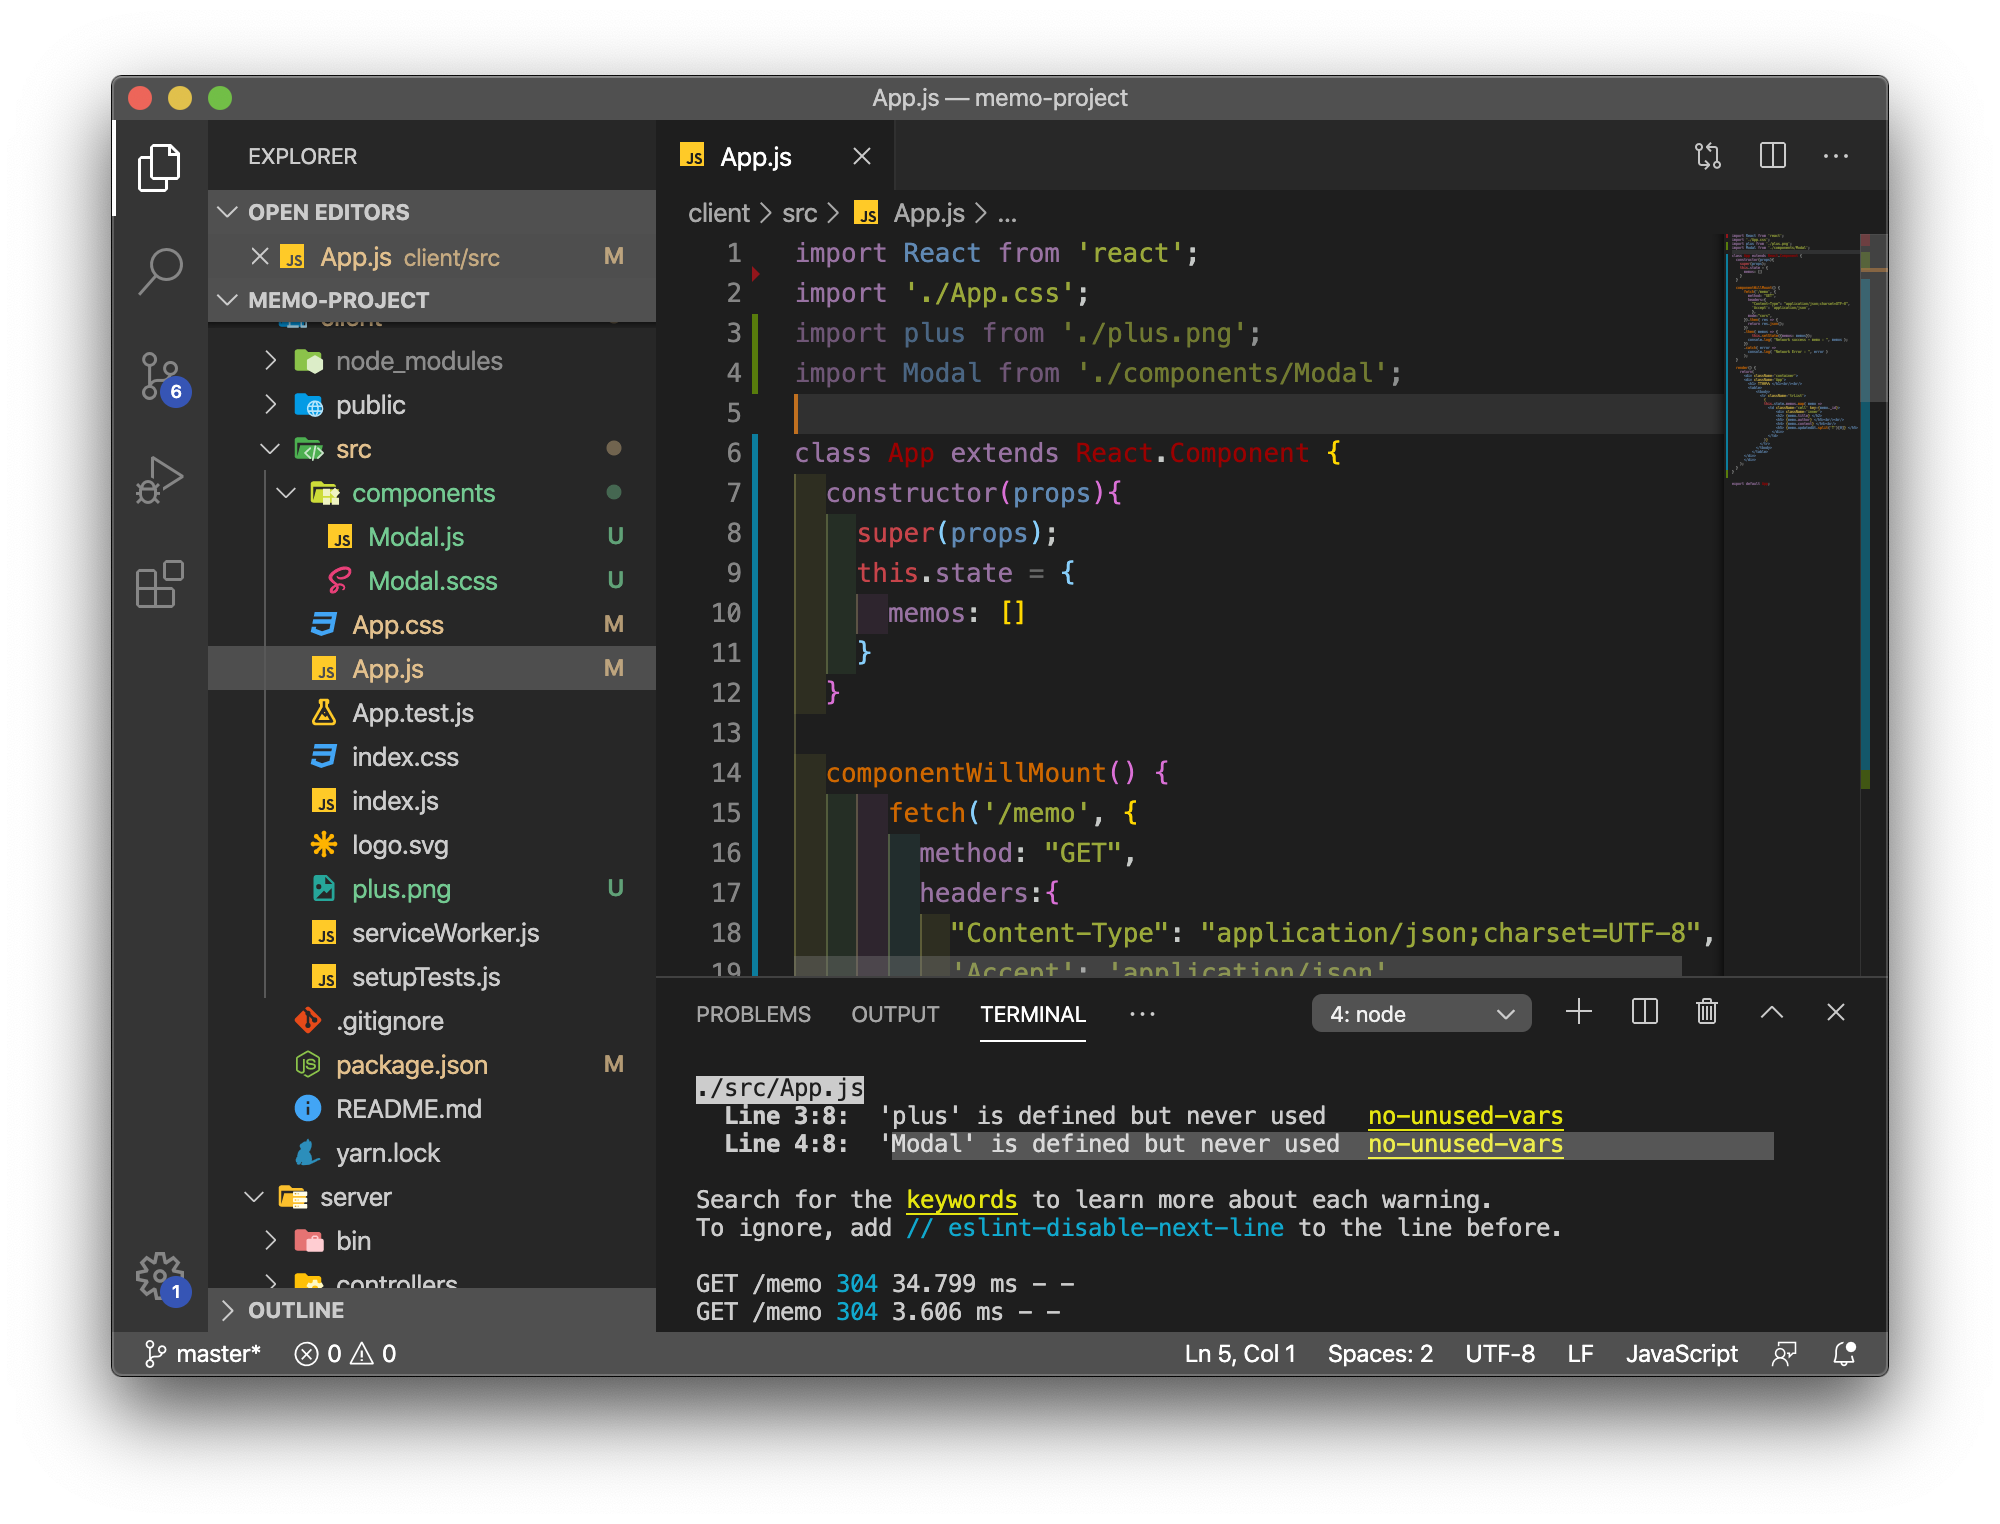
현재 이미지를 불러오고, Modal component를 생성했습니다.
App.js에서 import를 이용하여 불러와 주세요 ❗️ (3줄 ~ 4줄)
이제부터 Modal파일들을 채워보겠습니다.
자세한 설명은 하지 않을 예정입니다. 필요한 부분은 그 부분만 스스로 알아보시길 바랍니다❗️
// client/src/components/Modal.js

import React, { Component } from 'react';
import './Modal.scss';


class Modal extends Component {
  state = {
    title : "",
    content : "",
    author : ""
  }

  handleClick = (event) => {
    fetch(`/memo`, {
      method: "POST",
      headers:{
      'Content-Type': 'application/json;charset=UTF-8',
      'Accept': 'application/json',
      },
        mode: 'cors',
        body: JSON.stringify({ // fetch 특징
          title: this.state.title,
          content: this.state.content,
          author: this.state.author,
        }),
      })
      .then((response) => {
        this.props.close();
         return response.json();
        })
      .catch((err) => {
        console.log(err);
        // this.props.close;
    });
  }


  handleChange = (event) => {
    const { target: { name, value } } = event // 비구조화 할당
    this.setState({[name] : value})
}

  render() {
    const { isOpen, close } = this.props;

    return (
      <React.Fragment>
    {
      isOpen ?
      <React.Fragment>
        <div className="Modal-overlay" onClick={close} />
        <div className="Modal">
          <h1 className="title"> 메모를 기록하세요! </h1>
          <div className="content">
            <h4><input type='text' placeholder='아이디를 입력하세요' name='author' value={this.state.author} onChange={this.handleChange}></input></h4>
            <br/>
            <h4><input type='text' placeholder='제목을 입력하세요' name='title' value={this.state.title} onChange={this.handleChange}></input></h4>
            <br/>
            <textarea name='content' value={this.state.content} onChange={this.handleChange}></textarea>
          </div>
          <div className="button-wrap">
            <button onClick={this.handleClick} ><p>메모 추가하기</p></button>
          </div>
        </div>
      </React.Fragment> : null
}
    </React.Fragment>
    );
  }
}

export default Modal;
이젠 scss 파일을 생성해볼텐데요.
css 파일과는 조금... 다릅니다 ❗️
scss파일을 사용하려면 client 프로젝트에서 아래의 명령어를 입력해주셔야 합니다.
$ yarn add node-sass
설치가 끝났다면 아래의 scss 소스를 채워주세요.
/* client/src/components/Modal.scss */

.Modal-overlay{
    position: fixed;
    top: 0;
    left: 0;
    bottom: 0;
    right: 0;
    background-color: rgba(0,0,0,0.16);

  }
  .Modal{
      padding: 30px;
      position: fixed;
      border-radius: 20px;
      top: 50%;
      left: 50%;
      transform: translate(-50%, -50%);
      width: 400px;
      height: 600px;
      box-shadow: 0px 3px 6px rgba(0,0,0,0.16);
      & > * {
        &:first-child{
          margin-top: 16px;
        }
        margin-left: 16px;
        margin-right: 16px;
      }
      p.title{
        padding-top: 20px;
        font-size: 16pt;
        font-weight: bold;
        color: #333;
        margin: 10px;
      }
      .content{
        // border-top: 1px solid #bebebe;
        margin: 40px 0px;
        padding: 15 px;
        p{
            padding: 8px;
          font-size: 12pt;
          color: #999;
        }
      }

      textarea {
        width: 300px;
        height: 200px;
        border-radius: 7px;
        background: #fafafa;
        box-shadow: inset 5px 5px 7px #eeeeee, inset -5px -5px 7px #ffffff;
        border: 0px;
        font-size: 20px;
        padding: 10px;
      }
      input {
        height: 40px ;
        width: 300px;
        border-radius: 6px;
        background: #fafafa;
        box-shadow: inset 4px 4px 5px #eeeeee, inset -4px -4px 5px #ffffff;
        border: 2px #646a73;
        margin: 0px 20px;
        padding-left: 10px;
        font-size: 14px;
      }

      .button-wrap{
        margin: 0;
        // margin-top: 8px;
        button{
          width: 80%;
          bottom: 3;
          padding: 10px 0;
          border-radius: 10px;
          font-size: 20pt;
          color: #6b6a68;
          box-shadow: 8px 8px 15px #e9e9e9, -8px -8px 15px #ffffff;
          border: 0;
          cursor: pointer;
          &:hover{
            // background-color: #7f49c8;
          }
          &:active{
            // background-color: #7e49c8;
          }
        }
      }
    }
Modal 파일을 채워넣었으니 이제 App.js 에서 Modal을 불러와보도록 하겠습니다.
App.js 에서 수정할 부분을 차근차근 알아보도록 할게요❗️
1. state에 isModalOpen 값 초기화
constructor(props){
    super(props);
    this.state = {
      isModalOpen: false,
      memos: []
    }
}
2. App.js 에서 모든 메모가 모두 출력되면 그 이후에 모달 생성 버튼 만들기
return (
  <div className='container'>
  <div className='App'>
    <h1> 메모장 </h1><br/><br/>
    <table>
      <tbody>
        <tr className='trList'>
          {
            this.state.memos.map ( memo =>
              <td className='cell' key={memo._id}>
                <div className='inner'>
                  <h2> {memo.title} </h2>
                  <h5> {memo.author} </h5><br/><br/>
                  <h4> {memo.content} </h4><br/>
                </div>
              </td>
            )}
          // 여기부터 추가
          <td className='cell' >
            <div className='inner' onClick={this.openModal}>
              <img src={plus} className='picture' alt='logo' />
            </div>
          </td>
          // 여기까지 추가
          </tr>
        </tbody>
      </table>
      // 여기부터 추가
      <main className='App'>
        <Modal isOpen={this.state.isModalOpen} close={this.closeModal} />
      </main>
      // 여기까지 추가
    </div>
  </div>
);
2. 버튼을 누르면 openModal() & closeModal() 이 실행되게 로직 만들기
class App extends Component {

  constructor(props){ ... }

    openModal = () => {
    	this.setState({ isModalOpen: true });
    }

    closeModal = () => {
        this.setState({ isModalOpen: false });
        this.getAllMemos();
    }

    getAllMemos = () => {
    	fetch('/memo', {
	      	method: "GET",
      		headers:{
        		'Content-Type': 'application/json;charset=UTF-8',
        		'Accept': 'application/json',
        	},
      		mode:'cors',
    	}).then( res => {
      			return res.json();
    	}).then( memos => {
        	this.setState({memos: memos});
      		console.log( "Network success - memo : ", memos );
    	}).catch( error =>
      		console.log( "Network Error : ", error )
    	);
  	}

	//  ...
}
여기까지 잘 따라오셨나요❓
많이 지치셔도 잘 따라오셨습니다 〰️
➕버튼을 한 번 눌러보세요 〰️


성공적으로 모달까지 만드셨네요 👏🏻👏🏻👏🏻
혹시 잘안되는 부분있으면 댓글로 남겨주세요.
제가 최대한 댓글달아보도록 하겠습니다.
그럼 'Express + React, 간단한 프로젝트 만들기' 시리즈는 이렇게 마무리하겠습니다.
따라오느라고 고생많으셨어요 😆
'BACKEND > Node' 카테고리의 다른 글
| Express + passport, 어렵지 않게 사용하기 1 (2) | 2020.04.27 |
|---|---|
| Express, 어렵지 않게 시작하기 (3) | 2020.04.26 |
| 화살표 함수, 어렵지 않게 사용하기 (2) | 2020.04.22 |
| Express + React, 간단한 프로젝트 만들기 2 (1) | 2020.04.17 |
| Express + React, 간단한 프로젝트 만들기 1 (0) | 2020.04.12 |

Backend Software Engineer
𝐒𝐮𝐧 · 𝙂𝙮𝙚𝙤𝙣𝙜𝙨𝙪𝙣 𝙋𝙖𝙧𝙠